
bean id="wordDao" class="com.word.dao.WordDao"
bean id="registerService" class="com.word.service.WordRegisterService"
constructor-arg ref="wordDao"
bean/>
이렇게 constructor-arg ref 를 통해 참조를 해주었는데
이것을 @Autowired를 통해 생략해줄 수 있다. 그 대신 저 wordDao 를 참조할 때에 예를들어
WordRegisterService에서 wordDao를 이용할 때에 위에 @Autowired 라고 적어주면 이놈이 알아서 bean 에서 찾아서 객체의 타입이 일치하는 객체를 자동으로 주입해준다.
@Resource 는 객체의 이름이 일치하는 것을 찾아서 자동으로 주입해준다. Autowired는 생성자 프로퍼티 메서드에 모두 사용이 가능하지만 Resource는 생성자에는 사용이 불가능하다.
그리고 Autowired 와 Resource 를 사용할 때에는 디폴트 생성자를 꼭 생성해주어야 한다.
그리고 해당 xml에 <context:annotation-config /> 를 적어줘야 한다.
추가적으로
beans xmlns="http://www.springframework.org/schema/beans"
xmlns:context="http://www.springframework.org/schema/context"
xmlns:xsi="http://www.w3.org/2001/XMLSchema-instance"
xsi:schemaLocation="http://www.springframework.org/schema/beans
http://www.springframework.org/schema/beans/spring-beans.xsd
http://www.springframework.org/schema/context
http://www.springframework.org/schema/context/spring-context.xsd"
이것으로 수정해야한다.
만약 객체가 같고 이름이 다른 경우
bean id="wordDao1" class="com.word.dao.WordDao"
bean id="wordDao2" class="com.word.dao.WordDao"
bean id="wordDao3" class="com.word.dao.WordDao"
exception이 발생하게 된다.
이 경우에 <qualifier value="usedDao"/> 를 xml에 작성하고
Autowired 밑에 @Qualifier("usedDao") 라고 명시를 해준다.
하지만 만약 java 파일에 private WordDao wordDao; 이렇게 선언이 되어있고 bean 의 id가 wordDao로 같다면 에러없이 수행이 된다 같은 객체가 bean으로 있다고 하더라도 말이다. 하지만 좋은 표현방법은 아니고 qualifier를 쓰는 것이 좋다.
bean 은 스프링 컨테이너 초기화 떄에 빈 객체가 생성 및 주입이 되고 스프링 컨테이너가 종료될 때에 빈 객체 소멸된다
이 때 bean 이 생성되고 소멸될 때에 메서드를 이용해 내가 원하는 행동을 할 수 있다. 이에는 2가지 방법이 있는데
먼저 인터페이스를 활용하는 방법이 있다.
InitializingBean 과 DisposableBean 이 2개의 인터페이스를 이용하는 것이다. 이 둘을 implements해주고
afterPropertiesSet() 과 destroy() 를 이용하여서 생성과 소멸될 때의 행동을 정의할 수 있다.
public class BookRegisterService implements InitializingBean, DisposableBean {
public void destroy() throws Exception {
// TODO Auto-generated method stub
System.out.println("bean 객체 소멸");
}
@Override
public void afterPropertiesSet() throws Exception {
// TODO Auto-generated method stub
System.out.println("bean 객체 생성");
}
2번째에는 xml 파일의 속성을 이용하는 방식이다.
<bean id="bookRegisterService" class="com.brms.book.service.BookRegisterService"
init-method="initMethod" destroy-method="destroyMethod"/>
를 선언해주고 "" 안의 명과 똑같은 이름을 메서드로 호출해주면 된다.
public void initMethod() {
System.out.println("BookRegisterService 빈(Bean)객체 생성 단계");
}
public void destroyMethod() {
System.out.println("BookRegisterService 빈(Bean)객체 소멸 단계");
}
다음과 같이 선언해주면 된다.
둘 다 취향대로 해주면 된다.
ㅡㅡㅡ
applicationContext.xml 파일을 java 파일 형식으로 바꿔줄 수가 있다.
class 위에 @Configuration 를 적어준다.
bean id="studentDao" class="ems.member.dao.StudentDao"
은
@Bean
public StudentDao studentDao() {
return new StudentDao();
}
로
<bean id="registerService" class="ems.member.service.StudentRegisterService">
<constructor-arg ref="studentDao" ></constructor-arg>
</bean>
은
public StudentRegisterService registerService() {
return new StudentRegisterService(studentDao());
}
안에다가 studentDao() 를 해주면 된다.
<property name="userPw" value="tiger" /> 들은
public DataBaseConnectionInfo dataBaseConnectionInfoDev() {
DataBaseConnectionInfo infoDev = new DataBaseConnectionInfo();
infoDev.setJdbcUrl("jdbc:oracle:thin:@localhost:1521:xe");
infoDev.setUserId("scott");
infoDev.setUserPw("tiger");
return infoDev;
}
다음과 같이 표현한다.
<property name="developers">
<list>
<value>Cheney.</value>
<value>Eloy.</value>
<value>Jasper.</value>
<value>Dillorn.</value>
</list>
</property> 는
ArrayList developers = new ArrayList();
developers.add("Cheney.");
developers.add("Eloy.");
developers.add("Jasper.");
developers.add("Dillon.");
developers.add("Kian.");
info.setDevelopers(developers);
다음과 같이 집어 넣는다.
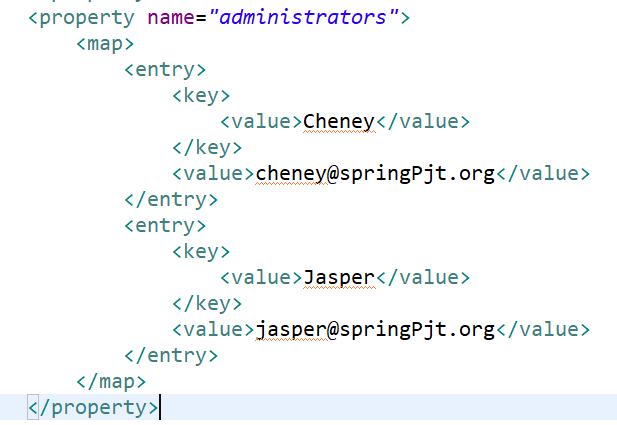
은
Map<String, String> administrators = new HashMap<String, String>();
administrators.put("Cheney", "cheney@springPjt.org");
administrators.put("Jasper", "jasper@springPjt.org");
info.setAdministrators(administrators);
으로.
그리고 GenericXmlApplicationContext 가 아닌
AnnotationConfigApplicationContext ctx =
new AnnotationConfigApplicationContext(MemberConfig.class);
를 사용해준다.
'공부 기록들' 카테고리의 다른 글
| 2020.03.27 Spring(3) (0) | 2020.03.30 |
|---|---|
| 2020.03.26 SQL sql loader 와 merge (0) | 2020.03.26 |
| 2020.03.19 Spring(1) (0) | 2020.03.19 |
| 2020.03.11 JSP(2) (0) | 2020.03.11 |
| 2020.03.10 JSP (1) (0) | 2020.03.10 |